

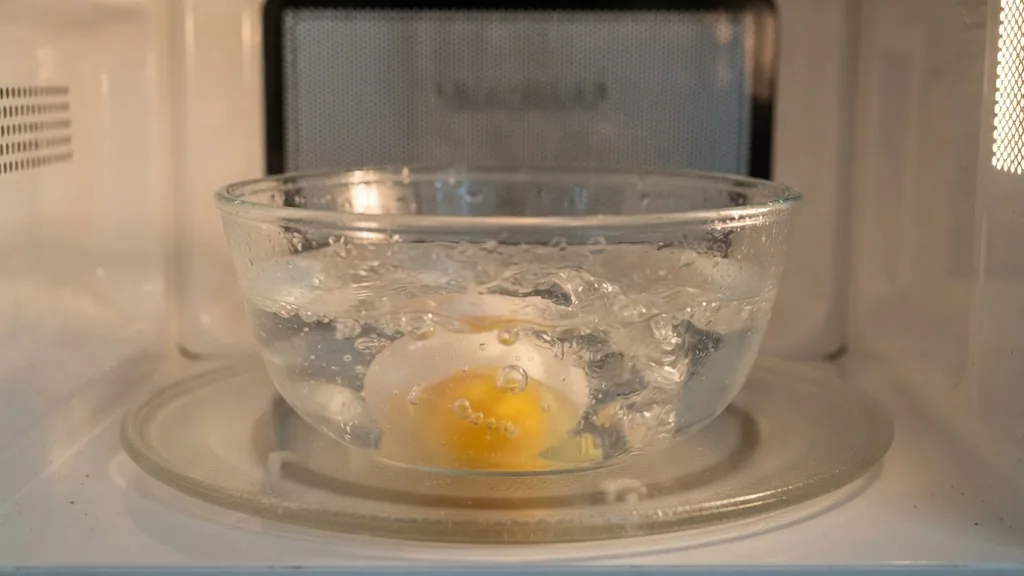
Mastering the art of poached eggs often feels like a culinary hurdle reserved for professional chefs or those with infinite patience at the stovetop. The traditional method—carefully swirling boiling water, adding a splash of vinegar, and hovering over the pot to ensure the whites set perfectly—is undeniably labor-intensive.
However, learning how to make poached eggs in microwave appliances can revolutionize your breakfast routine. By leveraging the rapid heating capabilities of electromagnetic radiation, you can achieve a tender, set white and a warm, liquid yolk in a fraction of the time required for conventional boiling.
Understanding the Physics of Microwave Egg Cooking
To successfully execute this technique, one must first grasp how a microwave interacts with an egg. Unlike a stovetop burner that transfers thermal energy through conduction and convection, a microwave uses waves to excite water molecules within the food.
When you place an egg in a microwave safe bowl filled with water, the energy is absorbed by the liquid molecules, causing them to vibrate rapidly and generate heat. This heat is then transferred to the egg proteins, causing them to denature and coagulate.
The primary challenge in cooking eggs this way is the internal pressure. Because the yolk is encased in a membrane and the white is surrounded by a shell (or, in this case, the surrounding water), the rapid expansion of steam can cause the egg to burst if not handled correctly. This is why you must always pierce the yolk—or at least ensure it is completely submerged—before heating.
The goal is to create a controlled environment where the white sets firmly enough to hold the delicate yolk while maintaining a creamy, runny center. Understanding that your specific microwave model may vary in wattage is crucial; a 1200-watt machine will cook an egg significantly faster than a 700-watt model, meaning you must adjust your seconds accordingly.
The Essential Equipment and Preparation Steps
Before you begin, gathering the right tools is paramount. You do not need expensive gadgets, but you do need items that are truly microwave safe.
A small glass or ceramic ramekin is ideal for a single egg, as it keeps the shape of the egg contained, preventing the white from spreading too thin. You will also need a small saucer or a microwave-safe cover to prevent potential splatters, which can turn a quick breakfast into a cleanup nightmare.
Start by filling your container with about half a cup of room-temperature water. Adding a small dash of vinegar can help the proteins in the white coagulate more quickly, resulting in a cleaner shape, though it is not strictly mandatory. Carefully crack your egg into the water.
If you are worried about the yolk breaking, you can crack the egg into a separate small dish first and gently slide it into the water-filled ramekin. For those who want to learn more about the science of protein coagulation, the Exploratorium’s guide on egg science provides excellent context on how temperature affects texture.
- Select a deep, microwave-safe bowl or ramekin.
- Fill with enough water to fully submerge the egg.
- Add a teaspoon of white vinegar for better protein structure.
- Crack the egg gently to avoid rupturing the yolk.
- Pierce the yolk once with a toothpick to prevent steam buildup.
- Cover the container with a saucer to trap steam and prevent popping.
Calibrating Cooking Time for Perfect Results
The most common frustration when learning how to make poached eggs in microwave setups is inconsistency. Because every microwave has a different power output, there is no universal “magic number” for seconds. However, a good baseline for a large, cold egg in a 1000-watt microwave is approximately 50 to 60 seconds.
If you prefer a firmer yolk, you might need an additional 10 to 15 seconds. It is always better to undercook slightly and add time in 5-second increments than to overcook and end up with a rubbery, exploded mess.
When the timer dings, do not remove the egg immediately. Let it sit in the hot water for another 30 to 60 seconds. This “carry-over” heat finishes the cooking process gently, ensuring the whites are opaque and fully set without turning the yolk into a hard-boiled puck.
Once the resting period is over, use a slotted spoon to carefully lift the egg from the water. Blot it gently on a paper towel to remove excess liquid before placing it on your toast or serving it alongside your meal. This step is vital to avoid a soggy breakfast.
Comparing Stovetop vs. Microwave Poaching
It is helpful to look at the differences between traditional methods and the microwave approach to decide which fits your lifestyle best. While the stovetop method is considered the “gold standard” for restaurant-quality aesthetics, the microwave method wins on efficiency and ease of cleanup. The following table highlights the key differences between these two common approaches to poaching.
| Feature | Stovetop Poaching | Microwave Poaching |
|---|---|---|
| Active Time | 5-8 minutes | 1-2 minutes |
| Cleanup Difficulty | High (pot, ladle, bowls) | Low (one ramekin) |
| Consistency | Easier to monitor visually | Dependent on wattage |
| Skill Level | Intermediate | Beginner |
Troubleshooting Common Microwave Poaching Issues
If you find that your eggs are consistently exploding or coming out with raw whites, you likely need to adjust your technique. An explosion usually indicates that the steam has nowhere to escape.
Ensure that your egg is completely covered by water; if the top of the egg is exposed to the air, the proteins will dehydrate and turn rubbery, while the internal pressure will build up too quickly. If you are using a plastic microwave poacher, ensure the lid is properly ventilated.
Another common issue is the white spreading out into a thin, wispy mess. This usually happens if the water is too shallow or if the egg is not fresh. Older eggs have thinner whites that break down easily.
If you only have older eggs, the vinegar trick becomes essential, as the acidity helps bridge the gaps in the proteins. Additionally, avoid using high power settings if your microwave is particularly powerful. If you have a setting for 70% or 80% power, try using that; it cooks the egg more slowly and evenly, resulting in a much more tender final product that mimics the texture of a traditionally poached egg.
Advanced Techniques and Culinary Applications
Once you are comfortable with the basic method, you can start experimenting with flavors and presentations. Poached eggs are incredibly versatile.
You can infuse the poaching water with aromatics like a small sprig of thyme, a pinch of salt, or a dash of chili flakes to impart a subtle flavor to the egg white. While the yolk itself remains protected inside its membrane, the white will absorb some of these seasonings, elevating a simple breakfast into something gourmet.
You can also try poaching multiple eggs at once, provided you have a large enough container. If you are using a wide, shallow bowl, you can cook two eggs side-by-side. However, be aware that this will increase the required time significantly.
You should increase the cooking duration by about 30% for a second egg, but keep a close eye on the process. Many people find that cooking eggs individually in separate bowls is still faster and more reliable than trying to crowd the microwave. Once you have mastered these steps, you can serve your eggs atop sautéed spinach, smoked salmon, or a thick slice of sourdough bread for a balanced, protein-rich meal that takes less than three minutes to prepare from start to finish.
Addressing Topical Gaps: Safety and Efficiency
A common question is whether you can poach an egg without any water at all. While some gadgets claim to do this, it is generally not recommended for the “poached” texture. Without water, the egg essentially “steams” in its own moisture, which often leads to a rubbery, uneven texture.
The water acts as a heat conductor, ensuring the heat is distributed evenly around the egg. If you are in a rush and skip the water, you are essentially making a microwave-fried egg, which has a very different mouthfeel.
Furthermore, many users wonder about the safety of using plastic microwave poachers. While most are BPA-free, it is always best to use glass or ceramic when possible. Glass is inert, meaning it won’t leach chemicals into your food, and it is much easier to clean.
If you are concerned about the smell of sulfur that can sometimes linger after cooking eggs in a microwave, simply add a slice of lemon to the water or wipe down the interior of the microwave with a vinegar-based solution afterward. This neutralizes the odor-causing compounds effectively, keeping your kitchen smelling fresh.
Frequently Asked Questions
Can I poach two eggs at once in the microwave?
Yes, you can poach two eggs at once, but use a larger, wider container to ensure they don’t touch. Increase your cooking time by approximately 30-50% compared to a single egg. Always monitor them closely during the last 20 seconds to prevent overcooking or potential explosions.
Why do my microwave-poached eggs keep exploding?
Explosions occur due to rapid steam buildup inside the yolk. To prevent this, always pierce the yolk once with a toothpick before cooking. Additionally, ensure the egg is fully submerged in water and use a cover to regulate the temperature and steam pressure within the container.
Is it necessary to use vinegar when poaching in the microwave?
Vinegar is not strictly required, but it is highly recommended. The acidity helps the egg whites coagulate and hold their shape more effectively, especially if the eggs are not farm-fresh. It creates a cleaner, more attractive poached egg without the wispy, spread-out white texture.
How can I tell if the egg is finished cooking?
The egg is ready when the whites are completely opaque and firm to the touch, while the yolk remains soft and slightly jiggly. If you are unsure, gently poke the white with a spoon; if it feels set like jelly, it is perfectly cooked and ready to serve.


