

Learning how to microwave eggs is one of those kitchen hacks that can transform your morning routine, especially when you are pressed for time. Many people assume that the microwave is only for reheating leftovers, but it is actually a surprisingly effective tool for cooking delicate proteins like eggs.
When done correctly, you can achieve fluffy scrambled eggs, a perfectly set poached egg, or even a quick omelet without needing to dirty a frying pan or wait for the stovetop to heat up. The key lies in understanding how microwaves interact with the high water and fat content of an egg, which requires a bit of finesse to avoid the dreaded “rubber” texture or, worse, an explosion.
Understanding the Science of Microwave Cooking for Eggs
To successfully cook eggs in a microwave, you must first understand that microwaves heat food by vibrating water molecules at a high frequency. Because an egg is primarily composed of water and proteins, it reacts very quickly to this energy.
If you apply too much power for too long, the internal steam builds up pressure faster than the proteins can coagulate, leading to a rapid expansion of the yolk or white. This is why you often hear of eggs exploding in the microwave; it is essentially a steam-pressure incident.
To mitigate this, you need to disrupt the structure of the egg or provide a controlled environment. When you beat eggs before placing them in the bowl, you are essentially breaking down the membranes and mixing the fat (yolk) with the protein (white). This homogenization allows the heat to distribute more evenly throughout the dish.
Furthermore, using short bursts of power with frequent stirring is the industry-standard technique for preventing localized overheating. Professional chefs often suggest that while the microwave isn’t a replacement for a seasoned cast-iron skillet, it is a superior tool for speed and efficiency in a high-paced environment. According to the United States Department of Agriculture, proper handling and thorough cooking are essential for food safety, and the microwave is a perfectly acceptable method as long as the internal temperature reaches the recommended safe levels for poultry products.
The Essential Technique for Fluffy Scrambled Eggs
Making scrambled eggs in the microwave is perhaps the most common application, and it is remarkably easy once you master the timing. Start by selecting a microwave-safe ceramic or glass bowl. Avoid thin plastic containers, as they can warp or transfer chemicals when exposed to the high heat of an egg dish.
Begin by cracking two large eggs into your bowl. Add a splash of milk, cream, or even water to introduce extra steam during the cooking process; this helps keep the eggs moist rather than dry.
Use a fork to vigorously beat eggs until the yolks and whites are completely combined and no streaks remain. Season with a pinch of salt and cracked pepper before putting the bowl into the microwave.
The secret to success here is the “30-second rule.” Microwave the mixture on high for 30 seconds, then remove the bowl and stir thoroughly. The edges will likely be set, while the center remains liquid.
Return it to the microwave for another 20 to 30 seconds. Stir again. Repeat this process until the eggs are almost set but still look slightly wet.
The residual heat from the bowl will finish the cooking process while you are getting your plate ready, ensuring they don’t turn into rubbery clumps. If you like cheese, add it during the final 30-second stir so it melts into the eggs without burning.
Cooking Poached Eggs Without the Mess
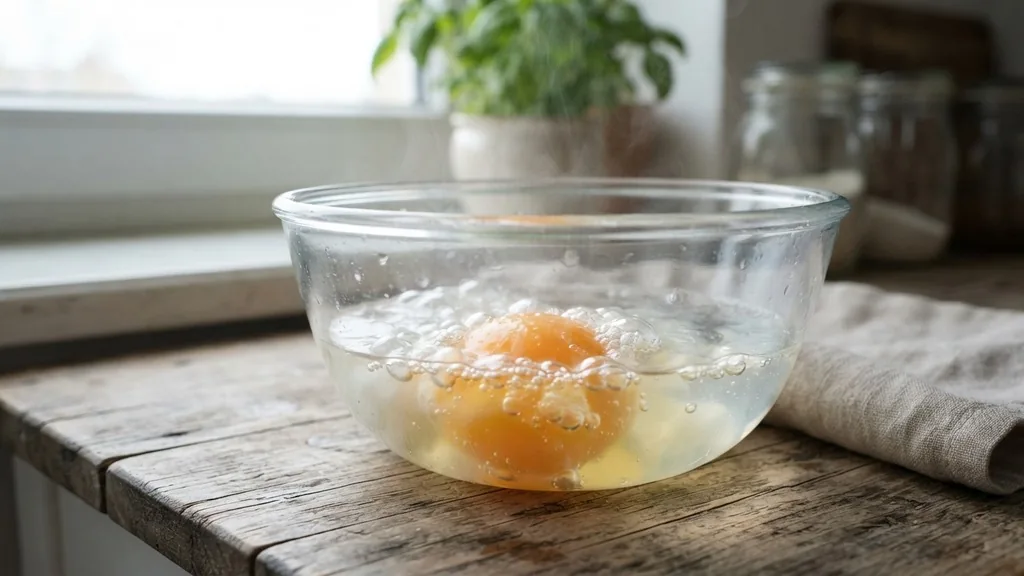
Many home cooks find poaching eggs on a stove intimidating, but the microwave makes this classic breakfast staple accessible to everyone. The goal is to simulate a gentle water bath.
Start by filling a microwave-safe mug or small bowl with about half a cup of water. Add a tiny splash of white vinegar; this helps the whites coagulate quickly around the yolk.
Carefully crack your egg into the water. Crucially, you must pierce the yolk gently with a toothpick or the tip of a knife. This tiny hole allows steam to escape, preventing the yolk from bursting under the surface.
Cover the mug with a small saucer or a microwave-safe plate. Cook on medium-high power for approximately 60 seconds. Every microwave is different, so start with 45 seconds and check the progress.
If the whites are still translucent, give it another 10 to 15 seconds. Once the whites are opaque and firm, lift the egg out with a slotted spoon. This method is incredibly clean and allows you to make a restaurant-quality poached egg in under two minutes.
Comparing Microwave Egg Methods
When you decide to cook eggs in the microwave, the method you choose will significantly impact the final texture and presentation. The following table breaks down the common approaches to help you decide which is best for your morning needs.
| Method | Prep Time | Texture | Best For |
|---|---|---|---|
| Scrambled | 1 Minute | Fluffy & Soft | Quick breakfast on the go |
| Poached | 2 Minutes | Delicate & Runny | Avocado toast or salads |
| Omelet | 3 Minutes | Firm & Folded | Adding veggies and meats |
| Hard “Boiled” | 5 Minutes | Solid & Uniform | Salads or snacking |
Safety Protocols: Why You Should Never Microwave Eggs in the Shell
A major topical gap in many articles is the dangerous practice of microwaving eggs in the shell. To be perfectly clear: you should never attempt this. The shell acts as a pressure vessel.
As the moisture inside turns to steam, the internal pressure increases rapidly. Because the shell is rigid, it cannot expand, leading to a violent explosion that can damage the interior of your microwave and cause severe burns to anyone nearby. Even if the egg doesn’t explode while inside the microwave, the internal pressure remains high, and it may burst the moment you touch it with a spoon or fork.
Always crack the egg into a container. If you want a hard-cooked texture, there are specialized microwave egg cookers available that feature a metal-shielded design to safely steam the egg without the pressure buildup. These devices work by creating a controlled, humid environment that mimics a steamer basket.
If you do not have one of these specialized gadgets, it is far safer to stick to the methods listed above. Always prioritize safety over convenience; a few minutes saved is not worth the risk of a kitchen accident.
Enhancing Your Microwave Eggs with Add-ins
Once you have mastered the base technique, you can treat your microwave eggs as a blank canvas. Because the cooking process is so fast, you can customize your dish every single day without feeling like you are stuck in a rut.
- Vegetables: Finely dice bell peppers, spinach, or mushrooms. Because these have high water content, they cook perfectly alongside the eggs.
- Proteins: Pre-cooked bacon bits, diced ham, or smoked salmon are excellent additions. Add these during the last 30 seconds of cooking so they warm through without drying out.
- Herbs: Fresh chives, parsley, or dill should be added after the eggs are finished cooking to preserve their bright flavor and color.
- Dairy: A dollop of sour cream or Greek yogurt folded in after cooking adds a luxurious, creamy mouthfeel that elevates the dish.
- Spices: Beyond basic salt and pepper, try a dash of smoked paprika, chili flakes, or garlic powder to introduce complexity.
When incorporating these extras, remember that they add mass to the mixture. If you load up your bowl with too many vegetables or meats, you may need to increase your total cooking time by 15 to 20 seconds. Always stir well between increments to ensure the added ingredients are evenly distributed and the heat reaches the center of the mixture.
Troubleshooting Common Microwave Issues
Even with the best instructions, you might encounter issues when you first start. If your eggs come out rubbery, you are likely overcooking them. Remember that the microwave continues to cook the food for a few seconds after the timer stops, thanks to carry-over heat.
If the eggs look “done” while in the microwave, they are already overcooked. Aim to take them out when they still look slightly underdone—the residual heat will finish the job on the plate.
If your eggs are watery, you likely didn’t beat eggs enough or your microwave power setting is too high. Using a lower power setting (around 50% or 70%) can be a great way to gain more control if you find your microwave is particularly powerful. This slows down the cooking process, allowing the proteins to set more gently.
If you find the eggs are sticking to the side of the bowl, lightly grease the container with a tiny amount of butter or non-stick spray before adding the eggs. This small step makes cleanup significantly faster and ensures you get every bit of your meal onto the plate.
Finally, consider the size of your bowl. A bowl that is too large will spread the eggs too thin, causing the edges to cook instantly while the middle stays raw.
A smaller, deeper bowl is generally better for a single-serving portion, as it creates a thicker mass that cooks more uniformly. Experimenting with your specific microwave’s wattage will eventually lead to consistent, perfect results every time you decide to cook a quick meal.
Frequently Asked Questions
Can I cook a sunny side up egg in the microwave?
It is technically possible, but generally not recommended. It is very difficult to get the whites to set without the yolk overcooking or exploding. If you want a runny yolk, the poaching method described above is a much safer and more reliable way to achieve that texture.
Is it safe to microwave eggs out of the shell?
Yes, it is perfectly safe to microwave eggs as long as they are removed from the shell and placed in a microwave-safe container. Always ensure you pierce the yolk if you are cooking it whole, or beat the eggs thoroughly if you are making a scramble to prevent pressure buildup.
How do I stop the eggs from getting rubbery?
The key to avoiding a rubbery texture is to stop the cooking process early. Remove the eggs when they still appear slightly wet and glossy. The residual heat from the bowl will continue to cook them to perfection once you take them out. Avoid using 100% power for long, continuous intervals.
Can I microwave eggs with cheese?
Absolutely. Adding cheese is a great way to improve the flavor and texture of microwave eggs. For best results, stir the cheese in during the final 30 seconds of cooking. This allows the cheese to melt and incorporate into the eggs without burning or becoming overly oily.


