

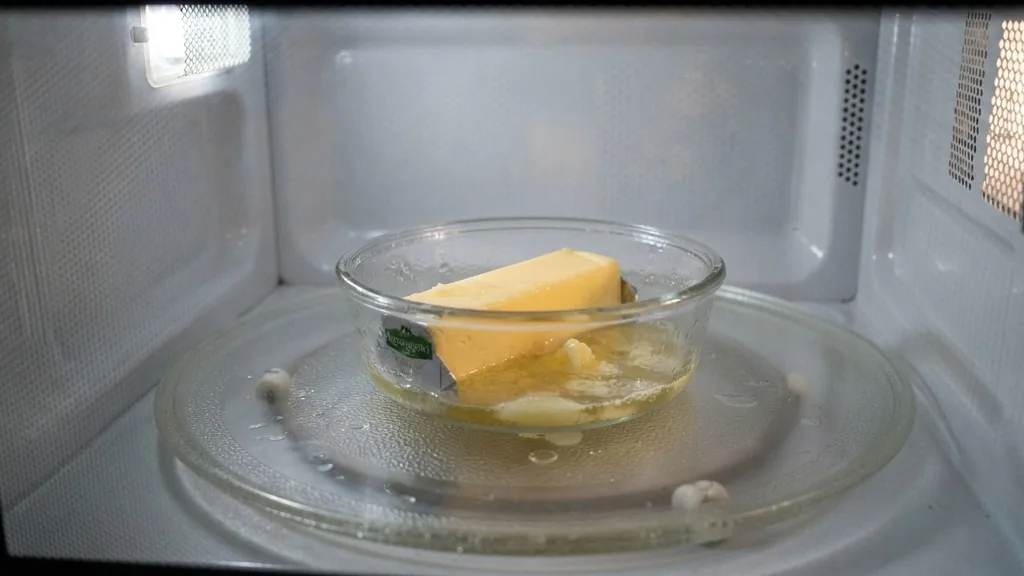
Mastering the art of how to melt butter in microwave is a fundamental skill for any home cook, whether you are preparing a quick batch of brownies or drizzling golden liquid fat over freshly popped popcorn. While it may seem like a trivial kitchen task, the process is fraught with potential pitfalls, such as uneven heating or the dreaded “butter explosion” that leaves your appliance coated in a greasy film. By understanding the science of fat-based emulsions and the specific mechanics of microwave radiation, you can achieve perfect results every time without ruining your equipment or the texture of your ingredients.
The Science Behind Microwave Butter Heating
To understand how to melt butter in microwave settings, one must first grasp how microwave ovens interact with dairy fats. Unlike water, which is highly polar and responds rapidly to the high-frequency electromagnetic waves generated by a magnetron, butter is primarily composed of milk fat, water, and milk solids.
When you place a stick of butter in the microwave, the water molecules within the butter begin to vibrate and rotate, generating heat through friction. This heat is then transferred to the surrounding fat molecules, causing the solid crystalline structure of the butter to break down into a liquid state.
Because butter has a relatively low smoke point and contains volatile milk solids, it is susceptible to localized overheating. If the microwave power is too high, the water content can turn into steam faster than the fat can distribute the heat, leading to the rapid expansion of air pockets. This is why you often hear a popping sound; those are small pockets of steam escaping the fat matrix.
If left unchecked, these pops can become explosive, spraying butter across the interior of your microwave. To prevent this, you must rely on controlled, low-power intervals rather than a single long blast. Understanding that heat distribution in a microwave is rarely uniform is the first step toward becoming a more proficient cook.
Step-by-Step Technique for Perfectly Melted Butter
If you want to know how to melt butter in microwave applications without the mess, follow a disciplined, incremental approach. The goal is to reach a state of complete liquefaction while maintaining the integrity of the milk solids. Start by removing the butter from its paper or foil wrapper, as these materials can sometimes contain metallic traces or cause uneven heating.
Place your butter in a microwave-safe dish—glass or ceramic is ideal—and cut the butter into smaller, uniform cubes. This increases the surface area, allowing for a more consistent melt throughout the entire mass.
Once the butter is prepared, select a low power setting on your microwave. Most modern appliances allow you to adjust the power level; setting it to 30% or 50% is significantly safer than using the default 100% power. Heat the butter in short, 10-second bursts.
After each interval, open the door and stir the butter with a small spoon. This manual agitation is critical because it redistributes the heat from the already-melted portions to the remaining solid chunks, preventing the outer edges from burning while the core remains cold. Continue this cycle until only a few small, pea-sized pieces remain, then let the residual heat finish the job as you stir it away from the heat source.
Safety Measures and Avoiding Common Explosions
The most frequent complaint regarding the use of a microwave to melt butter is the sudden, violent splatter that occurs when the butter reaches its boiling point. This happens because the milk solids at the bottom of the dish can trap steam.
To mitigate this risk, you should always use a cover. A microwave-safe plate or a specialized splatter guard creates a semi-sealed environment that keeps the interior of the microwave clean and helps regulate the internal temperature of the container.
Another crucial safety consideration involves the container itself. Never use plastic containers that are not explicitly labeled as microwave-safe, as the high heat of the butter can cause low-quality plastics to warp or even leach chemicals into your food. Glass or high-quality ceramic is the best choice for this task.
Furthermore, avoid the temptation to leave the butter unattended for long periods. Even if you are familiar with how to melt butter in microwave cycles, a lapse in judgment can lead to a fire hazard if the butter is left on high power for too long.
If you happen to notice the butter starting to smoke or smell acrid, turn off the microwave immediately and let it cool before opening the door. For more information on food safety and appliance usage, you can refer to the Food Safety and Inspection Service for guidelines on handling dairy products.
Comparison of Melting Methods: Microwave vs. Stovetop
Choosing the right method for your recipe depends on the level of precision you require. While the microwave is undeniably faster, the stovetop provides more control over the browning process, which is essential for certain culinary applications like beurre noisette.
| Feature | Microwave Melting | Stovetop Melting |
|---|---|---|
| Speed | Extremely Fast | Moderate |
| Precision | Low (risk of uneven heating) | High (constant visual control) |
| Cleaning | Minimal (if covered) | Requires scrubbing a saucepan |
| Best For | Baking, popcorn, quick sauces | Browning, delicate emulsification |
As shown in the table above, the microwave is the clear winner for efficiency. If your recipe calls for melted butter to be folded into a cake batter or drizzled over toast, the microwave is perfectly adequate.
However, if you are making a delicate hollandaise sauce or need to brown the butter to achieve a nutty flavor profile, the stovetop is superior because it allows you to observe the color change of the milk solids in real-time. Knowing when to use which tool is a mark of an experienced home cook.
Addressing Topical Gaps: Common Pitfalls and Solutions
Many people struggle with the “how to melt butter in microwave” process because they assume it is a “set it and forget it” task. A common gap in knowledge is the impact of butter temperature prior to microwaving.
If you are starting with frozen butter, you cannot simply use the same timing as you would for refrigerated butter. Frozen butter requires a “defrost” cycle or a significantly lower power setting to prevent the outside from turning into a greasy puddle while the center remains frozen.
Another often overlooked factor is the container size relative to the amount of butter. Using a massive bowl for a single tablespoon of butter will result in the butter spreading too thin, which causes it to heat up too quickly and potentially splatter. Always choose a dish that is appropriately sized for the amount of butter you are melting.
Additionally, some users report that their butter becomes “grainy” after being microwaved. This occurs when the butter is overheated, causing the emulsion of fat and milk solids to break. If this happens, you have effectively separated the butter into oil and whey.
While this is fine for some baking, it ruins the texture for finishing sauces. By sticking to low power and frequent stirring, you can avoid this structural breakdown entirely.
Creative Uses for Microwave-Melted Butter
Once you have mastered the technique, the applications for melted butter are endless. Beyond the obvious uses in baking cakes, cookies, and brownies, melted butter is an essential component for quick flavor infusions. You can stir fresh herbs, garlic, or lemon zest into your melted butter to create an instant finishing sauce for steamed vegetables, grilled fish, or steaks.
- Drizzle over air-popped popcorn with a dusting of nutritional yeast or sea salt.
- Brush onto sourdough bread before grilling to achieve a perfect, golden-brown crust.
- Use as a base for quick dessert glazes by whisking in powdered sugar and vanilla extract.
- Mix with honey or maple syrup for an instant topping for pancakes or waffles.
- Apply to corn-on-the-cob immediately after boiling for maximum absorption.
- Use it to grease baking pans thoroughly, ensuring no batter sticks to the corners.
Because the microwave heats the butter so efficiently, you can use this method to prepare small batches of compound butter as well. By melting the butter just enough to soften it, you can fold in savory ingredients like minced shallots or blue cheese, then roll it into a log and chill it.
This allows you to have gourmet additions ready in the fridge at a moment’s notice. The versatility of this ingredient, when handled correctly, elevates simple home cooking into something truly special.
Frequently Asked Questions
Is it better to melt butter on the stove or in the microwave?
The stove offers more control for browning or delicate sauces, while the microwave is ideal for speed and convenience. For most baking and everyday tasks, the microwave is perfectly sufficient, provided you use low power settings and stir frequently to ensure an even, consistent melt.
How do I prevent butter from exploding in the microwave?
The best way to avoid explosions is to use a microwave-safe cover, such as a paper towel or a dedicated lid. Additionally, melting the butter at 50% power in short, 10-second intervals prevents the rapid steam buildup that causes butter to splatter across the oven interior.
How long should I microwave a stick of butter?
There is no fixed time, as it depends on your microwave’s wattage and the starting temperature of the butter. A safe approach is to heat it for 10-second bursts, stirring between each, until the butter is mostly melted. This typically takes between 30 to 60 seconds total.
Can I melt butter in the microwave with water?
While some suggest adding a splash of water to the dish to create steam and prevent burning, it is generally unnecessary if you use low power and a cover. If you choose to add water, ensure it is only a very small amount to avoid changing the consistency of your recipe.


