

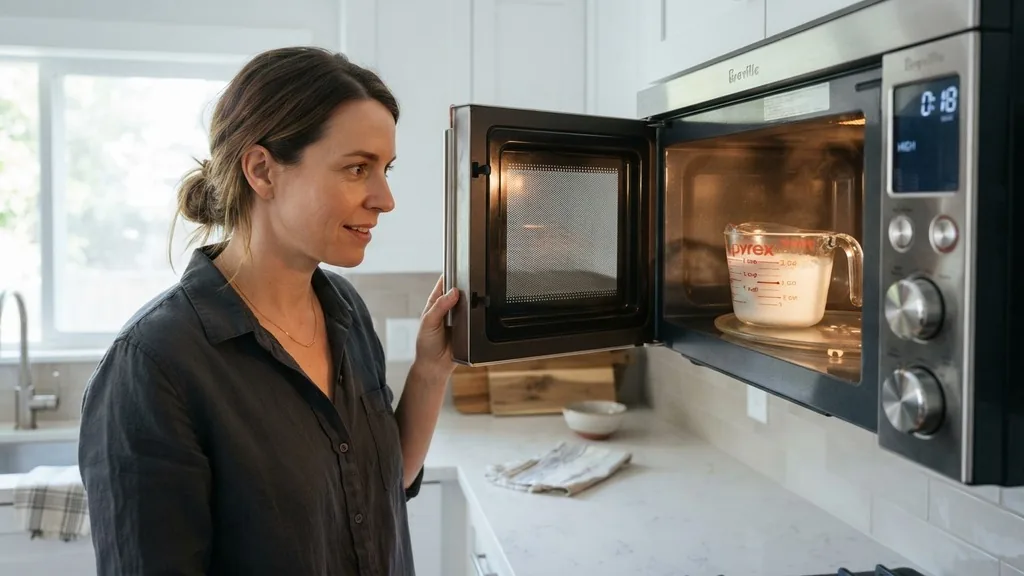
Achieving the perfect cup of cocoa requires more than just high-quality ingredients; it demands a precise approach to temperature management. Knowing how long to microwave milk for hot chocolate is the secret to avoiding burnt proteins and achieving that silky, comforting texture every time. While stovetop methods are traditional, the convenience of a microwave is unmatched for busy mornings or late-night cravings.
However, because microwaves vary significantly in power and efficiency, a one-size-fits-all approach often results in a messy spill or an unpleasantly scalded beverage. By mastering the timing and technique, you can produce a café-quality drink in under two minutes without the cleanup associated with a bulky saucepan.
Understanding Microwave Power and Heating Dynamics
To accurately answer how long to microwave milk for hot chocolate, you must first acknowledge that your microwave is not a static instrument. Most household units operate between 700 and 1200 watts. A 700-watt microwave will naturally take longer to heat a liquid than a high-powered 1200-watt model.
The primary goal when heating dairy is to reach a temperature between 150°F and 160°F (65°C to 71°C). This range is high enough to dissolve cocoa powder or melt chocolate chips effectively but low enough to prevent the milk from boiling over or developing a “skin” of denatured proteins.
When you place a mug of milk in the microwave, the electromagnetic waves cause water molecules to vibrate, creating heat through friction. Because milk is essentially a complex emulsion of water, fats, proteins, and sugars, it reacts differently than plain water. Proteins, specifically whey and casein, are sensitive to heat.
If you overheat the milk, these proteins begin to coagulate and stick to the bottom of the mug or form a film on the surface. To mitigate this, it is best to use shorter intervals of heating rather than one long, continuous cycle. This allows the heat to distribute evenly throughout the liquid, preventing localized “hot spots” that lead to boiling.
Recommended Timing by Microwave Wattage
The following table provides a general guideline for heating one cup (8 ounces) of milk. Note that these times are estimates; you should always observe the milk as it nears the end of the cycle to prevent overflow.
| Microwave Wattage | Estimated Time (Seconds) |
|---|---|
| 700 Watts | 90–110 Seconds |
| 900 Watts | 70–85 Seconds |
| 1100+ Watts | 50–65 Seconds |
As indicated in the table, the higher the wattage, the shorter the duration. If you are unsure of your microwave’s power, start with 60 seconds and check the temperature. If it is not quite hot enough, continue in 15-second increments.
This “pulse” method is the most reliable way to ensure you never cross the threshold from warm and creamy to scalded and bitter. Always use a microwave-safe mug—preferably ceramic or heavy glass—as these materials retain heat better than thin plastic or metal, which is strictly prohibited in microwave use due to arcing hazards.
The Importance of the Whisking Technique
Even if you get the timing perfect, the way you incorporate your cocoa matters. Many people make the mistake of adding powder to hot milk and hoping it dissolves on its own.
This often leads to clumps of dry cocoa floating on top or settling at the bottom of the mug. Instead, the most effective method involves a two-step process: mixing a small amount of milk with your cocoa powder to create a smooth, thick paste before adding the rest of the cold milk.
Once you have created this paste, you can microwave the mixture. After the timer goes off, use a small handheld milk frother or a standard wire whisk to agitate the liquid. This does two things: it ensures complete emulsification of the cocoa fats into the milk, and it introduces air, resulting in a light, frothy top that mimics high-end coffee shop beverages.
If you prefer a richer experience, you can add a pinch of salt or a drop of vanilla extract after the initial heating phase, then whisk again. The aeration process not only improves the mouthfeel but also helps the beverage cool slightly to a drinkable temperature faster.
Addressing Common Microwave Pitfalls
The most frequent complaint when learning how long to microwave milk for hot chocolate is the dreaded “boil-over.” Milk contains fats and proteins that create a surface tension barrier.
As the milk reaches its boiling point, steam gets trapped beneath this layer. When the pressure becomes too high, the surface tension breaks, and the milk surges upward, often spilling all over the microwave floor.
To prevent this, never fill your mug to the brim. Leave at least an inch of space at the top to account for the rise. Additionally, consider placing a wooden toothpick or a dedicated microwave-safe stirring rod in the mug.
This provides a nucleation point for bubbles to form and release slowly, rather than all at once. If you find that your milk consistently develops a skin, it is a sign that you are heating it for too long or at too high a temperature. Reducing the power level of your microwave—often labeled as “Power Level 7” or 70%—can significantly improve the quality of the final drink.
This slower, gentler heating method is the gold standard for baristas who need to heat milk without compromising its structural integrity. You can find more information on the chemistry of heating dairy at the National Institute of Diabetes and Digestive and Kidney Diseases, which provides comprehensive resources on nutritional components of dairy products.
Alternative Heating Methods for Special Recipes
While the microwave is efficient, there are instances where a saucepan is the superior tool. If you are preparing a large batch of hot chocolate for several people, or if you are using high-quality artisan chocolate bars that need to be melted slowly into the milk, the microwave may not be the best choice. In these cases, the stovetop allows for constant stirring and visual monitoring, which is crucial when melting solid chocolate.
When using a saucepan, heat the milk over medium-low heat. Do not let it reach a rolling boil. As soon as you see small bubbles forming around the edges of the pan, it is time to remove it from the heat or lower the temperature.
This is the optimal time to whisk in your chocolate. The difference between microwave-heated milk and stovetop-heated milk is primarily in the texture; stovetop milk often feels creamier because the heat is applied evenly from the bottom up without the “bouncing” effect of electromagnetic waves. However, for a single serving, the extra effort of cleaning a pan is rarely worth the marginal difference in quality.
Troubleshooting and Pro-Tips for Success
If you are frustrated by the results of your current routine, consider these expert tips to elevate your cocoa game. First, the type of milk you use drastically changes the outcome.
Whole milk provides the best texture and flavor because of its higher fat content. If you are using skim or almond milk, be aware that these liquids heat faster than whole milk and are more prone to burning because they lack the fat that acts as a buffer.
* Always stir the milk halfway through the heating time to distribute the heat.
* Use a wide-mouth mug to allow for better heat dissipation and easier whisking.
* If your milk accidentally boils over, clean the microwave immediately; dried milk proteins are notoriously difficult to remove once they have been baked onto the interior surfaces.
* Experiment with adding a small amount of heavy cream to your milk before heating for a more decadent, velvety finish.
* If you prefer a spiced hot chocolate, add your cinnamon, nutmeg, or chili powder to the milk before heating. This allows the heat to infuse the spices into the liquid, creating a much deeper flavor profile than simply stirring them in at the end.
By following these guidelines, you can transform a simple chore into a reliable, enjoyable ritual. The key is consistency. Once you find the exact time that works for your specific microwave and your favorite mug, you will never have to worry about burnt milk or clumpy cocoa again.
Frequently Asked Questions
Is it safe to microwave milk in a plastic container?
It is generally not recommended to microwave milk in plastic. Many plastics can leach chemicals when heated, and they often do not handle the high temperatures of boiling milk well. Always opt for ceramic, glass, or heat-resistant silicone mugs to ensure the safety and purity of your hot chocolate.
Why does my milk always spill over in the microwave?
Milk spills over because trapped steam bubbles beneath a layer of protein and fat. When the pressure builds, it ruptures the surface. To prevent this, use a larger container to leave room for expansion, microwave in shorter intervals, and consider placing a wooden spoon or stick in the mug to break the surface tension.
Can I microwave milk with the cocoa powder already in it?
Yes, you can, but it is often better to mix the cocoa with a small amount of milk first to create a paste. This prevents the powder from clumping. If you add it all at once, whisk the milk thoroughly halfway through the heating process to ensure everything is fully incorporated and smooth.
How do I know if the milk is too hot for cocoa?
If the milk is steaming heavily or you see a film forming on top, it is likely too hot. Ideally, you want the milk to be hot but not boiling. A temperature of 150°F to 160°F is perfect. If it tastes slightly bitter or “burnt,” you have likely exceeded the ideal temperature range.


