

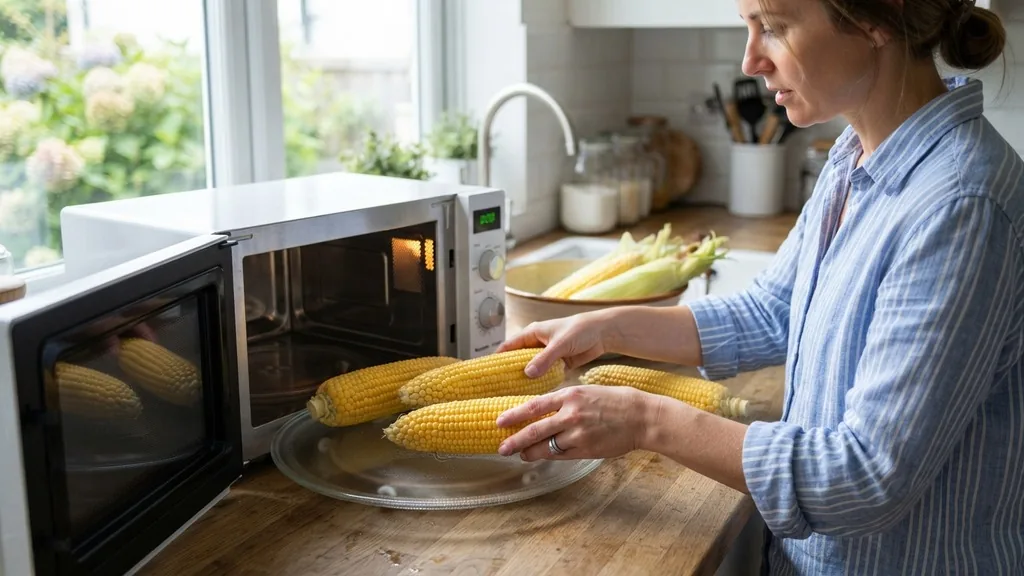
Microwaving corn is arguably the most efficient way to achieve perfectly tender, juicy kernels without the hassle of boiling a massive pot of water. Whether you are pressed for time on a busy weeknight or simply want to avoid heating up your kitchen during the summer months, understanding exactly how long to microwave corn is the secret to a successful side dish. While many home cooks worry about the texture becoming rubbery or uneven, the process is remarkably reliable when you follow specific timing guidelines based on your microwave’s wattage and the number of ears you are preparing.
Determining the Right Timing for Microwave Corn
The core question of how long to microwave corn depends heavily on the quantity of corn and the power output of your appliance. In a standard 1000-watt microwave, you should generally plan for 3 to 4 minutes per ear.
If you are cooking multiple ears simultaneously, you must adjust this time upward to account for the increased mass that the microwave energy needs to penetrate. A good rule of thumb is to add roughly 2 to 3 minutes for every additional ear of corn you add to the tray.
It is vital to recognize that microwaves operate by agitating water molecules within the food. Because fresh corn is naturally high in moisture, it is the ideal candidate for this cooking method. However, if you leave the corn in for too long, you risk dehydrating the kernels, which leads to a tough, chewy texture rather than the sweet, crisp bite most people prefer.
Always start on the shorter end of the recommended time range; you can always add an extra 30 seconds if the corn isn’t quite tender, but you cannot reverse the process once the kernels have become overcooked. Monitoring the internal steam buildup is also essential, as the trapped moisture acts as a mini-steamer for the kernels.
Cooking Corn in the Husk for Optimal Flavor
One of the most popular methods for preparing this vegetable involves leaving the husk intact. When you cook corn on the cob in its natural protective layer, the husks act as a sealed vessel, steaming the kernels in their own juices. This technique produces incredibly flavorful results that rival traditional boiling.
To do this, simply trim off the very bottom end of the ear—the part where the stalk attaches—about an inch up from the base. This allows you to easily slide the cooked corn out of the husk once it is finished.
Place the ear directly on the microwave turntable. If you are cooking two ears, place them side by side. For a single ear, 3 to 4 minutes is usually sufficient.
For two ears, aim for 6 to 8 minutes. Once the timer dings, let the corn rest inside the microwave for at least 2 minutes. This resting period is critical because the steam inside the husk remains extremely hot.
Handling the corn immediately after the timer goes off can result in severe steam burns. Using a towel or an oven mitt to remove the corn is a necessary safety precaution. Once cooled slightly, you can grab the silk end and shake the cob; it should slide right out, leaving the silk behind in the discarded husk.
Microwaving Corn Without the Husk
If you prefer to shuck the corn before cooking, the process changes slightly because you no longer have the natural steam barrier provided by the husk. When you remove the husks and silks beforehand, you must provide an alternative way to trap moisture.
The most effective technique is to wrap each ear corn in a damp paper towel. This mimics the steaming environment of the husk and prevents the kernels from drying out or shriveling during the cooking cycle.
Place the damp-towel-wrapped corn on a microwave-safe plate. You can cook one or two ears this way, but be mindful that the heat distribution may be slightly less even than with the husk-on method. For a single ear, 3 minutes is usually the sweet spot.
For two ears, increase the time to 5 or 6 minutes. After the time expires, carefully unwrap the paper towel. Be aware that the steam released will be very hot.
This method is excellent if you want to season the corn with butter or salt immediately after cooking, as the kernels are fully exposed and ready for toppings. You can find more detailed safety tips on handling hot food from the U.S. Department of Agriculture to ensure your kitchen practices remain safe.
Comparison of Microwave Corn Methods
Choosing the right preparation method depends on your priorities: convenience, flavor, or texture. The following table breaks down the differences between the most common approaches to help you decide which fits your meal plan best.
| Method | Moisture Retention | Ease of Cleaning | Best For |
|---|---|---|---|
| In Husk | Excellent | High (Silk stays in husk) | Large batches, simple prep |
| Damp Paper Towel | Good | Moderate | Quick single servings |
| Covered Dish | High | Low (Dish to wash) | Adding butter/herbs during cooking |
Each of these methods relies on the same basic principle: using steam to gently cook the corn microwave cycle. Regardless of the method chosen, always ensure your microwave is clean, as any leftover food particles can cause uneven heating or smoking during the process.
Addressing Common Challenges and Topical Gaps
A common issue that arises when people ask how long to microwave corn is the uneven cooking of multiple ears. Many users report that the middle of the cob is soft while the ends remain crunchy. This typically happens because microwaves don’t heat from the center outward in a perfectly uniform sphere.
To solve this, always arrange your ears of corn in a star pattern or parallel to each other, leaving the center of the turntable clear. If you are cooking more than four ears, it is better to do them in separate batches rather than overcrowding the microwave, which drastically increases the required duration and results in inconsistent results.
Another gap often overlooked is the wattage variance. If your microwave is older or has a lower wattage—perhaps 700 watts—your cooking times will need to be increased by about 25% to 30%. Conversely, if you have a high-powered 1200-watt commercial-style microwave, decrease your time by 15% to avoid rubbery kernels.
Always use a fork to test the tenderness of the kernels. If the fork slides into the kernels easily and they pop with a bit of resistance, the corn is perfectly cooked. If the kernels look dented or feel mushy, you have likely left them in too long.
Advanced Tips for Flavorful Results
Once you master the timing, you can elevate your microwave corn with simple flavor enhancements. If you are using the paper towel method, you can lightly coat the corn with olive oil or a small amount of butter before wrapping it.
The fat helps conduct heat evenly and infuses the kernels with richness. Adding a pinch of salt before cooking can also help draw out the natural sweetness of the corn, though some chefs argue that adding salt too early can toughen the skins—experiment to see what you prefer.
Another technique involves using a microwave-safe glass dish with a lid. Place the corn inside with a tablespoon of water at the bottom. The water creates a steam bath that ensures the entire cob is cooked through.
This is particularly useful if you are preparing frozen corn kernels, which require a different approach than fresh ears corn. For loose kernels, place them in a bowl with a splash of water, cover, and microwave for 3 to 4 minutes, stirring halfway through. This ensures that the heat is distributed evenly throughout the bowl, preventing cold spots.
Frequently Asked Questions
Can I microwave corn if it still has the silk on it?
Yes, you can. If you cook the corn in the husk, the silk will typically stay attached to the husk as you pull the cob out. If you shuck the corn first, ensure you remove as much silk as possible, as the residual strands can become tough and unpleasant to eat after being heated.
Is it better to boil or microwave corn on the cob?
Microwaving is generally considered better for retaining nutrients and flavor because it uses steam rather than submerging the corn in water, which can leach out vitamins. It is also significantly faster and requires much less cleanup than boiling a large pot of water on the stove.
What should I do if my corn is still cold in the middle?
If the center of the cob remains cold or crunchy, simply return it to the microwave for 30-second intervals. Ensure the corn is positioned toward the outer edge of the turntable, where the microwave energy is typically more concentrated, rather than sitting directly in the center of the tray.
How do I know when the corn is finished?
The corn is done when the kernels are bright yellow, plump, and tender. You can test this by piercing a kernel with a sharp knife or fork; the skin should offer a slight “pop” and the interior should be creamy and soft. If it feels hard or resistance is high, continue cooking.


